이번 시간에는 리액트의 컴포넌트 라이프싸이클에 대해서 배워 보겠습니다.
컴포넌트는 여러 기능들을 정해진 순서대로 실행합니다. 그것에 대해서 배워보겠습니다.
render를 할 때(컴포넌트를 띄울 때) 이 순서대로 실행될겁니다.
//Render : componentWillMount() -> render() -> componentDidMount()
첫번째는 componentWillMount
두번째는 render
세번째는 componentDidMount
이 싸이클은 자동으로 발생합니다.
console.log 를 통해서 위 순서대로 실행되는지 확인해보겠습니다.
class App extends Component {
//Render : componentWillMount() -> render() -> componentDidMount()
//Update : componentWillReceiveProps() -> shouldComponentUpdate() -> componentwillUpdate() -> render() -> componentDidUpdate
componentWillMount() {
console.log('will mount')
}
componentDidMount(){
console.log("did mount");
}
render() {
console.log("did render");
return (
<div className="App">
{movies.map((movie, index) => {
return (
<Movie title={movie.title} poster={movie.poster} key={index} />
);
})}
</div>
);
}
}
export default App;
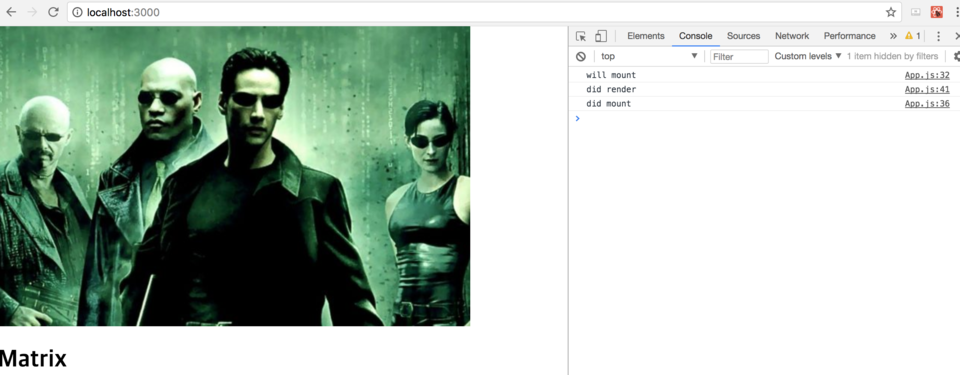
저장을 하고 크롬창에서 검사를 통해 확인해 보겠습니다. 아래와 같이 순서대로 출력되는 것을 확인하였습니다.
App.js:32 will mount
App.js:41 did render
App.js:36 did mount
예를 들어 , 영화앱과 같은 어플리케이션을 만든다면, will mount를 진행할때 api에 작업을 요청할 겁니다.
해당 작업 수행이 완료되면, 그 다음에 did mountf 부분에서 데이터 관련된 작업을 하게 될겁니다.
이 싸이클을 알아두는게 유용한 이유는, 컴포넌트를 만드는데 도움이 되기 때문입니다.
will mount를 보면 사이클이 시작되었음을 알게될거고,
render를 보면 이제 컴포넌트가 리액트에 존재하게 되었음을 알게 될겁니다.
did mount를 보면, 이제 성공적으로 리액트 컴포넌트가 자리잡았음을 알게 되는 것입니다.
update 조금 더 스텝이 많습니다.
첫번째는 componentWillReceiveProps 이건 컴포넌트가 새로운 props를 받았다는 뜻입니다.
두번째는 shouldComponentUpdate 리액트는 old props, 새로운 props를 살펴본 다음에,
이전과 새로운 prop가 다르면, shouldComponentUpdate() = true 라고 생각할 겁니다.
세번째는 componentwillUpdate
네번째는 render
다섯번째는 componentDidUpdate
이 순서를 잘 이해하면 나중에 컴포넌트를 빌드할 때 도움이 될 것입니다.
예를 들어 , component will update 수행할 때
어플리케이션에 뱅글뱅글 돌아가는 spinner를 붙일 수 있을 겁니다.
업데이트 이 후에는, 돌고 있던 '로딩 중 ' 메세지나 아이콘을 숨기면 될 겁니다.
이론의 세부적인 것은 다루지 않을 것이고 앞으로 실전으로 바로 해보면서 배우게 될 예정입니다.
더 자세한 라이프사이클 관련 링크는 아래를 참고하세요. 고맙습니다.
'React > 왕초보 도전' 카테고리의 다른 글
| 13. 간단한 영화 웹 서비스 만들기 8 (0) | 2018.01.09 |
|---|---|
| 12. 간단한 영화 웹 서비스 만들기 7 (0) | 2018.01.05 |
| 10. 간단한 영화 웹 서비스 만들기 5 (0) | 2017.12.29 |
| 8. 간단한 영화 웹 서비스 만들기 3 (0) | 2017.12.21 |
| 7. 간단한 영화 웹 서비스 만들기 2 (0) | 2017.12.19 |